Glowbom
Create your first trivia app
Installation
- Download Unity if you haven’t done it already. We recommend Unity 2019.2.3.
- Open your project.
- Open Scene file.
- Switch the platform to iOS by going to File->Build Settings… and clicking on Switch Platform.
- Open Glowbom Quests Editor by going to Window->Glowbom->Quests.
Make content changes
- Inside Quests panel in the All you can add, remove and modify screens.
- To run the project, click on Play button.
- Click on the first screen item from the All tab.
- Modify screen Title and text.
- Bellow Title and text you can find the decision buttons section. Each button has Title, Go To section, and Answer. Go To represents a screen number where the button leads to. Answer field can highlight the right and wrong answers (value 1 means right answer, 0 means wrong).
- To highlight the right and wrong answers, you need to send Answers Count to more than 0. More than 1 means more than one correct answer, 1 means only 1 correct answer. If Answers Count is 0, there will be no highlighting at all.
- To show the results, put [correctAnswers] and [totalQuestionsCount] inside the screen text field. The numbers will be replaced during the runtime. An example could be:
You got [correctAnswers] out of [totalQuestionsCount] questions correct.
Make design changes
- To make some design changes, go to Hierarchy.
- Select and expand Canvas->Front object to change the front screen of the app. Canvas->Front->Title and Canvas->Front->Author objects are usually used for displaying the app name and short description. You can also change text font and color from Inspector.
- To change the main screen text select objects Canvas->Panel->Title, Canvas->Panel->Text, and for each button Canvas->ButtonsPanel->Button->Text, Canvas->ButtonsPanel->Button1->Text, etc. Each object can be easily moved around using the standard controls of Unity.
- Background images can be changed from Inspector for Canvas->Front and Canvas->Background objects. You can use any image available in the plugin or choose your own if you put image files inside Assets/Glowbom/Quests/Resources/ folder.
Build and run your project
- To build the project go to File->Build Settings…, click Add Open Scenes and Build buttons.
- Open the project in Xcode.
- Add your own signing certificate at Unity-iPhone->Signing & Capabilities->Signing.
- Press Play button to run your app on the device.
Example app
Please download an example app for iOS and Android to explore what’s possible to build with Glowbom Quests.
Monetize your app using AdMob
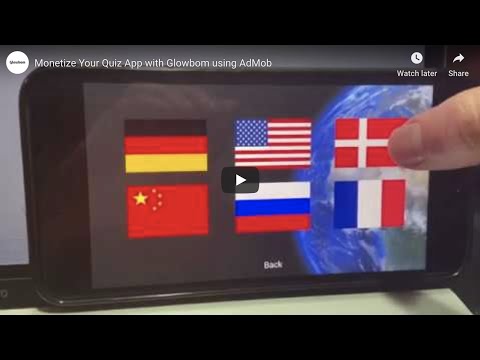
Set up ads
- Set up a new app on Google AdMob.
- Open Window->Glowbom->Monetization panel and copy App Id over there. Don’t forget to press Save button.
- Create Banner and Interstitial ads. We don’t support Rewarded and Native advanced ads yet.
- Copy Ad Ids to Glowbom Monetization panel and press Save button.
- Open Player Settings from File->Build Settings…
- In Other Settings section find Scripting Define Symbols field and put GLOWBOM_ADS constant over there.
- Download Google Mobile Ads Unity Plugin and open the unitypackage file.
- To enable Google Mobile Ads, go to Assets->Google Mobile Ads->Settings… and open Inspector.
- Enable Google Mobile Ads and put App Id inside Inspector window.
Build and run your project
- Build the project by clicking on Build button in File->Build Settings…
- Open the project in Xcode.
- Add your own signing certificate at Unity-iPhone->Signing & Capabilities->Signing.
- Download Google Mobile Ads SDK for iOS and unzip it to any folder you like.
- Add GoogleMobileAds.framework from this folder to Unity-iPhone->Build Phases->Link Binary With Libraries by clicking on +->Add Other…->Add Files…
- Add a path to Google Mobile Ads SDK folder into Framework Search Paths at Unity-iPhone->Build Settings and make it recursive.
- Open Info.plist file as Source Code from Project navigator and add GADIsAdManagerApp key set to true:
<key>GADIsAdManagerApp</key>
<true/>
- Press Play button to run your app on the device.
Deep dive into Glowbom Quests
Multiple quests
Glowbom Quests supports multiple quests in the same application. You can add and remove quests in Glowbom Quests panel inside Quests tab. There are 3 fields for each quest: Name, Image, and Link. If you have more than 1 quest in the app, you will see an additional quest selection menu when you launch your app. If Image field isn’t empty, the quest button in the quest selection menu will show the background image instead of text. If Image is empty, the button will show the text from Name field. Link field should contain a file name of the quest.
Each quest has Name field. To load a new quest, just type a quest file name inside Name field and press Load button. You can also create a new quest if you type a new file name inside Name field and press Save. If you put a sprite name inside Background Picture field, the sprite will be shown in the background when you launch the quest.
Functional buttons
Every quest screen item has decision buttons. Each button has Title, Go To section, and Answer. Go To represents a screen number where the button leads to. The button becomes Share button if Go To has the value of 10001, Ask Friend button if the value is 10002, and Back button if it’s 10003.
Design themes
The current version of Glowbom Quests has 3 design themes: DesignClassic, DesignPenguin, and DesignWorld. To switch the theme, just open a different scene file from Project window in Unity. The scene files are located in Assets/Glowbom/Quests. Each object on the scene can be easily moved around and changed using the standard controls of Unity. The main objects are the front screen (Canvas->Front), the background image (Canvas->Background), the main content title (Canvas->Panel->Title), the main content text (Canvas->Panel->Text), decision buttons (Canvas->ButtonsPanel), and the main image (Canvas->ButtonsPanel->MainImage).
Optimization tips for iOS
- Please read optimizing the size of the built iOS Player Unity Manual to reduce the build size for iOS.
- Please read reducing the file size of your build Unity Manual.
- Set Enabled Bitcode to No from Unity-iPhone->Build Settings in Xcode.
Optimization tips for Android
- Please read a practical guide to optimization for mobiles.
- Build an Android App Bundle instead of an apk file to reduce the build size for Android.
- Uncheck x86 from Target Architectures in Other Settings of Player Settings… Otherwise, you will have the following error after you upload a bundle to Google Play:
This release is not compliant with the Google Play 64-bit requirement